I buy most of my wood from a place in Chicago called
Wood World. Anyways, my wife began accompanying me on trips there and every time there was this huge slab of Honduras mahogany that I'd always come up with a new use for every time I saw it. Huge, 10' long, 3" thick (12/4), 28" wide.
For our first wedding anniversary my wife bought me said slab... I ride a bicycle and the IIT wood shop is only open when I'm at work. Plus, huge chunks of wood are like diamonds. If they're huge you do not cut them. The basic concept is to use the slab as a table but without cutting, drilling, or otherwise mechanically altering it.
 |
| This is the photo I received in a card for my wife and my's one year wedding anniversary. I removed the price from the sign, but it's roughly 72 board feet worth of wood. |
 |
| These are just some initial sketches. I initially wanted to use channel iron but it was pretty expensive. In my experience it tends to be higher quality steel. |
 |
| I borrowed the idea of the electrical outlets hidden in the steel structure from the tables in Crown Hall's Graham Resource Center library. |
 |
| 3D screen grab in Rhino. The table consists of three basic piece: the cast iron legs, the mahogany table top and the armature that ties it all together; which is also the part I have to make. It's essentially two custom bar clamps that are tied together with angle iron. |
 |
| Orthographic projection. We actually used this drawing on an ipad while I was in the shop. |
Actual fabrication was hectic, which I'm not used to. There's a translation from drawing to reality, "field fit," that needs to take place - especially since I'm not a veteran designer. We were rushing around the shop kind of fast because I made my friend Brian and his father, who show up at 6:45 AM every morning, stay until 8:00 PM, and it was really hot in the shop. Their shop is called Special Tool Engineering Company on the southwest side of Chicago. Brian is the third generation of his family to work there. I have to take photos of that place. You could build anything there.
 |
| This is a Bridgeport milling machine. It is to a machinist what a table saw is to a woodworker. |
 |
| I'd never seen one of these before, it's drill bit that's essentially used for zeroing a measurement. It has a separate metal piece for the tip that's connected with a spring. It's exactly 0.2000 inches so that you subtract 0.1. As soon as the tip begins to wobble you know you're up against the piece that you're measuring off of. |
 |
| This is the digital readout that gives X and Y coordinates. It does more than that but this was the first time I'd ever seen a digital readout on a Bridgeport. |
 |
| Drilling the actual holes to a five 10,000 of an inch. Totally unnecessary and really cool. |
 |
| Countersinking the holes to remove burrs. |
 |
| This is essentially an automated swivel head bandsaw. You put in a piece of flat stock (bars of steel)... |
 |
| ... and it advances the steel and cuts it perfectly. |
 |
| These are the holes being drilled for the bolts that clamp the table top. They got threaded after this but I didn't grab a photo of their threading setup. It was basically an arm that swiveled with the tap perpendicular at the tip. Much nicer than the typical hand tools I use because everything is square and flush when you're done. |
 |
| Ugh... I fancy myself a good welder (at least when the work is somewhat level or on a pipe), but I was unfamiliar with their MIG and it was running way too hot. |
 |
| Quenching the steel so I could get it home without lighting my car on fire. |
 |
| I ran some simple electrical on the back. Typical 14 gauge stuff, three duplexes total. |
 |
| Before I put the electrical on I steel wooled all the angle iron and rubbed boiled linseed oil into it. You have to wipe off the excess after about ten minutes or else it will be sticky for the rest of its existence. The linseed oil darkens the steel and gives it a waxy finish that protects it somewhat from rust. On the left you can see the swagged cord that connects the outlets. I have a grommet on the other side too so I can switch it if need be. |
 |
| Getting the slab in the room... |
 |
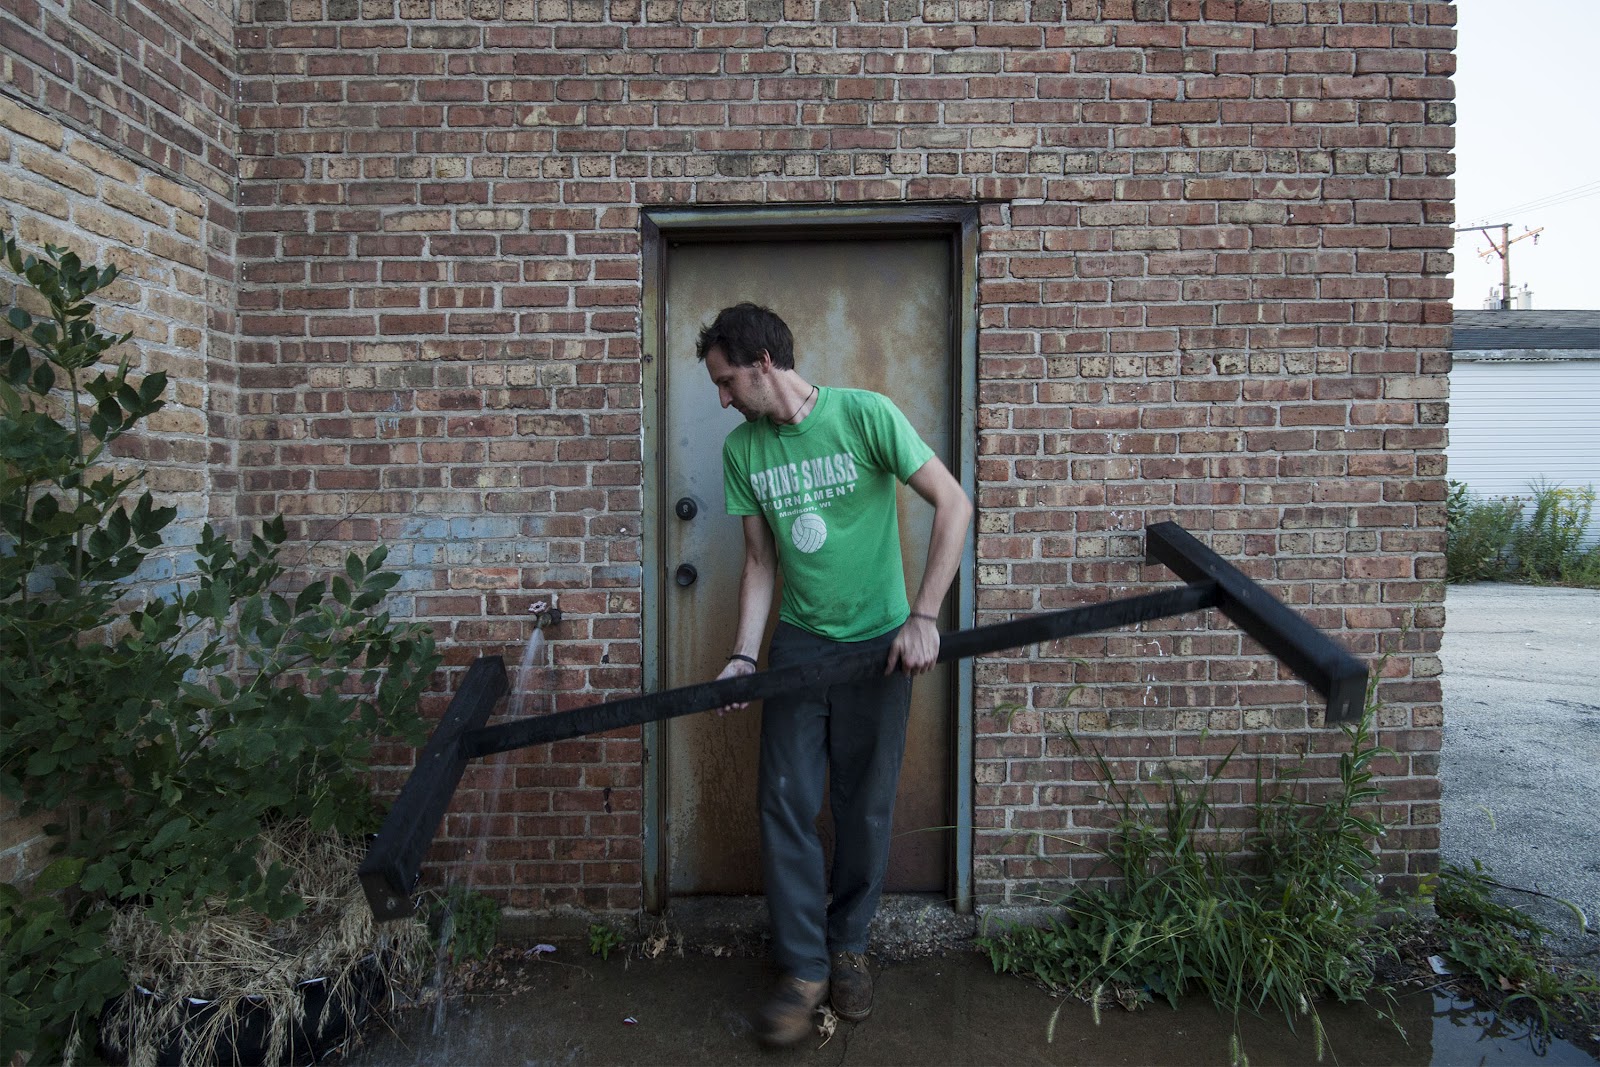
This is the connection to the legs. Two 5/8" lag bolts on each end. I should have welded a plate horizontally next to the angle, drilled another hole, and maybe put diagonal stiffeners in. It's essentially a point connection and isn't as rigid as it should be. I'll add it another time.
 |
| This is the fixed end of the armature on the back edge of the table. I may rotate the armature at some point too. You can see the slab isn't quite flat - I couldn't find a 30" planar (ha). |
|
 |
| The electrical is hidden in the back so the cords can be concealed to some degree. |
 |
| The 3" angle iron is slightly off center so that your legs won't hit the cross member if you cross your legs. The legs on this are from my lathe table except that this time they're turned the way they're supposed to sit. I chose 3" angle for two reasons: structurally it's spanning 6' 2" (74") and the rule of thumb is L/20 so 3.7" - which makes it undersized, but it's really only carrying a lateral load. Also, the table top really shouldn't be over 29" or 30" tall, the legs are 24" high, and the table top is 2-3/4" thick so anything bigger than 3" angle is going to make the table either too high or not leave enough room for your legs. If it's weak in any way it's torsion, but I don't perceive that as being a problem. |
 |
| I did a time lapse of all the sanding just to show how ridiculously laborious it is. At some point I may actually put all the stills together into a time lapse video. As my woodworking/architecture professor (Frank Flury) once told me "finishing is 50% of the work." It seems like way too much but it's dead on. Finishing takes forever and there's very little joy in it. I hooked up my orbital sander to the smallest cheapest wet-dry-vac I could find. Win, literally zero dust. Tropical hardwood dust is oddly scary - especially panga, jatoba, and the like. Plus I got to collect some of the dust in case I wanted to fill in the grain at some point. In my world instead of getting buttons in little packages with shirts you'd get sawdust with your handcrafted furniture in case you wanted to change the finish and make your own filler (using dust from the wood makes the color match). |
 |
| After sanding I raised the grain. That is, wiped the wood with a damp cloth to remove dust and make the grain stand up. After you sand wood and wet it the grain will feel different even when it's dry. If you sand it again it won't do this anymore. Even though I'm using an oil finish and it shouldn't be necessary. If the wood somehow gets wet later on it will no longer feel smooth. |
 |
| I started with 100 grit, did a quick pass of 120 (I'm weird), then 150, 220, and finished with 320. The finishes will later get 320 up to 600 grit and a 0000 steel wool. Kind of unnecessary. |
 |
| The finish for this ended up being about six coats of Watco Teak Oil wiped on, dried for one to two days between coats. It's not a protective finish and it takes forever to fully dry. First time I've ever used gloves, I recommend them. |
 |
| The finish isn't done yet so this is kind of a base coat. The teak oil has an "in-the-grain" look and feel so you can still feel the grain. |
 |
| This is after the second application of teak oil. it's still a little oily in this photo, but the grains starting to show much better. |
 |
| This is after it's a bit more dry. |
 |
| The flange at the end is 1/4" flat stock butt welded to the end of the 3" angle. You can see where it's welded from the bluing. It's tapped to accept the 3/4" bolt which holds a 1/2" piece of steel that is milled to hold the end of the bolt. |
 |
| The wood edge is the rough-sawn side, if I rotate it 180 there's a much cleaner side and no protruding clamp. |
 |
| Mostly finished. It's 10'2" (3100 mm) long, 28.5" (725 mm) wide, and the table top is at 29-1/2" (750 mm). The actual slab itself is 12/4. That is, 2-3/4" (70 mm). The legs are 76 lbs (35 kg) apiece, the armature is about 45 lbs (20 kg), and the table top is 220 lbs (100 kg) for a grand total of roughly 440 lbs (200 kg). Bucky wouldn't be impressed but the Vikings would probably approve. |
 |
| The finish is oddly hard to photograph. It looks glossy but it has a satin look and feel up close. |
 |
| Battlestation. My firm was selling their Aeron chairs so I picked two up for $40 apiece. I guess that's the upside to mass layoffs in the architecture field. |


2 comments:
That's simply incredible
Very nice work! The time lapse would be interesting.
Post a Comment